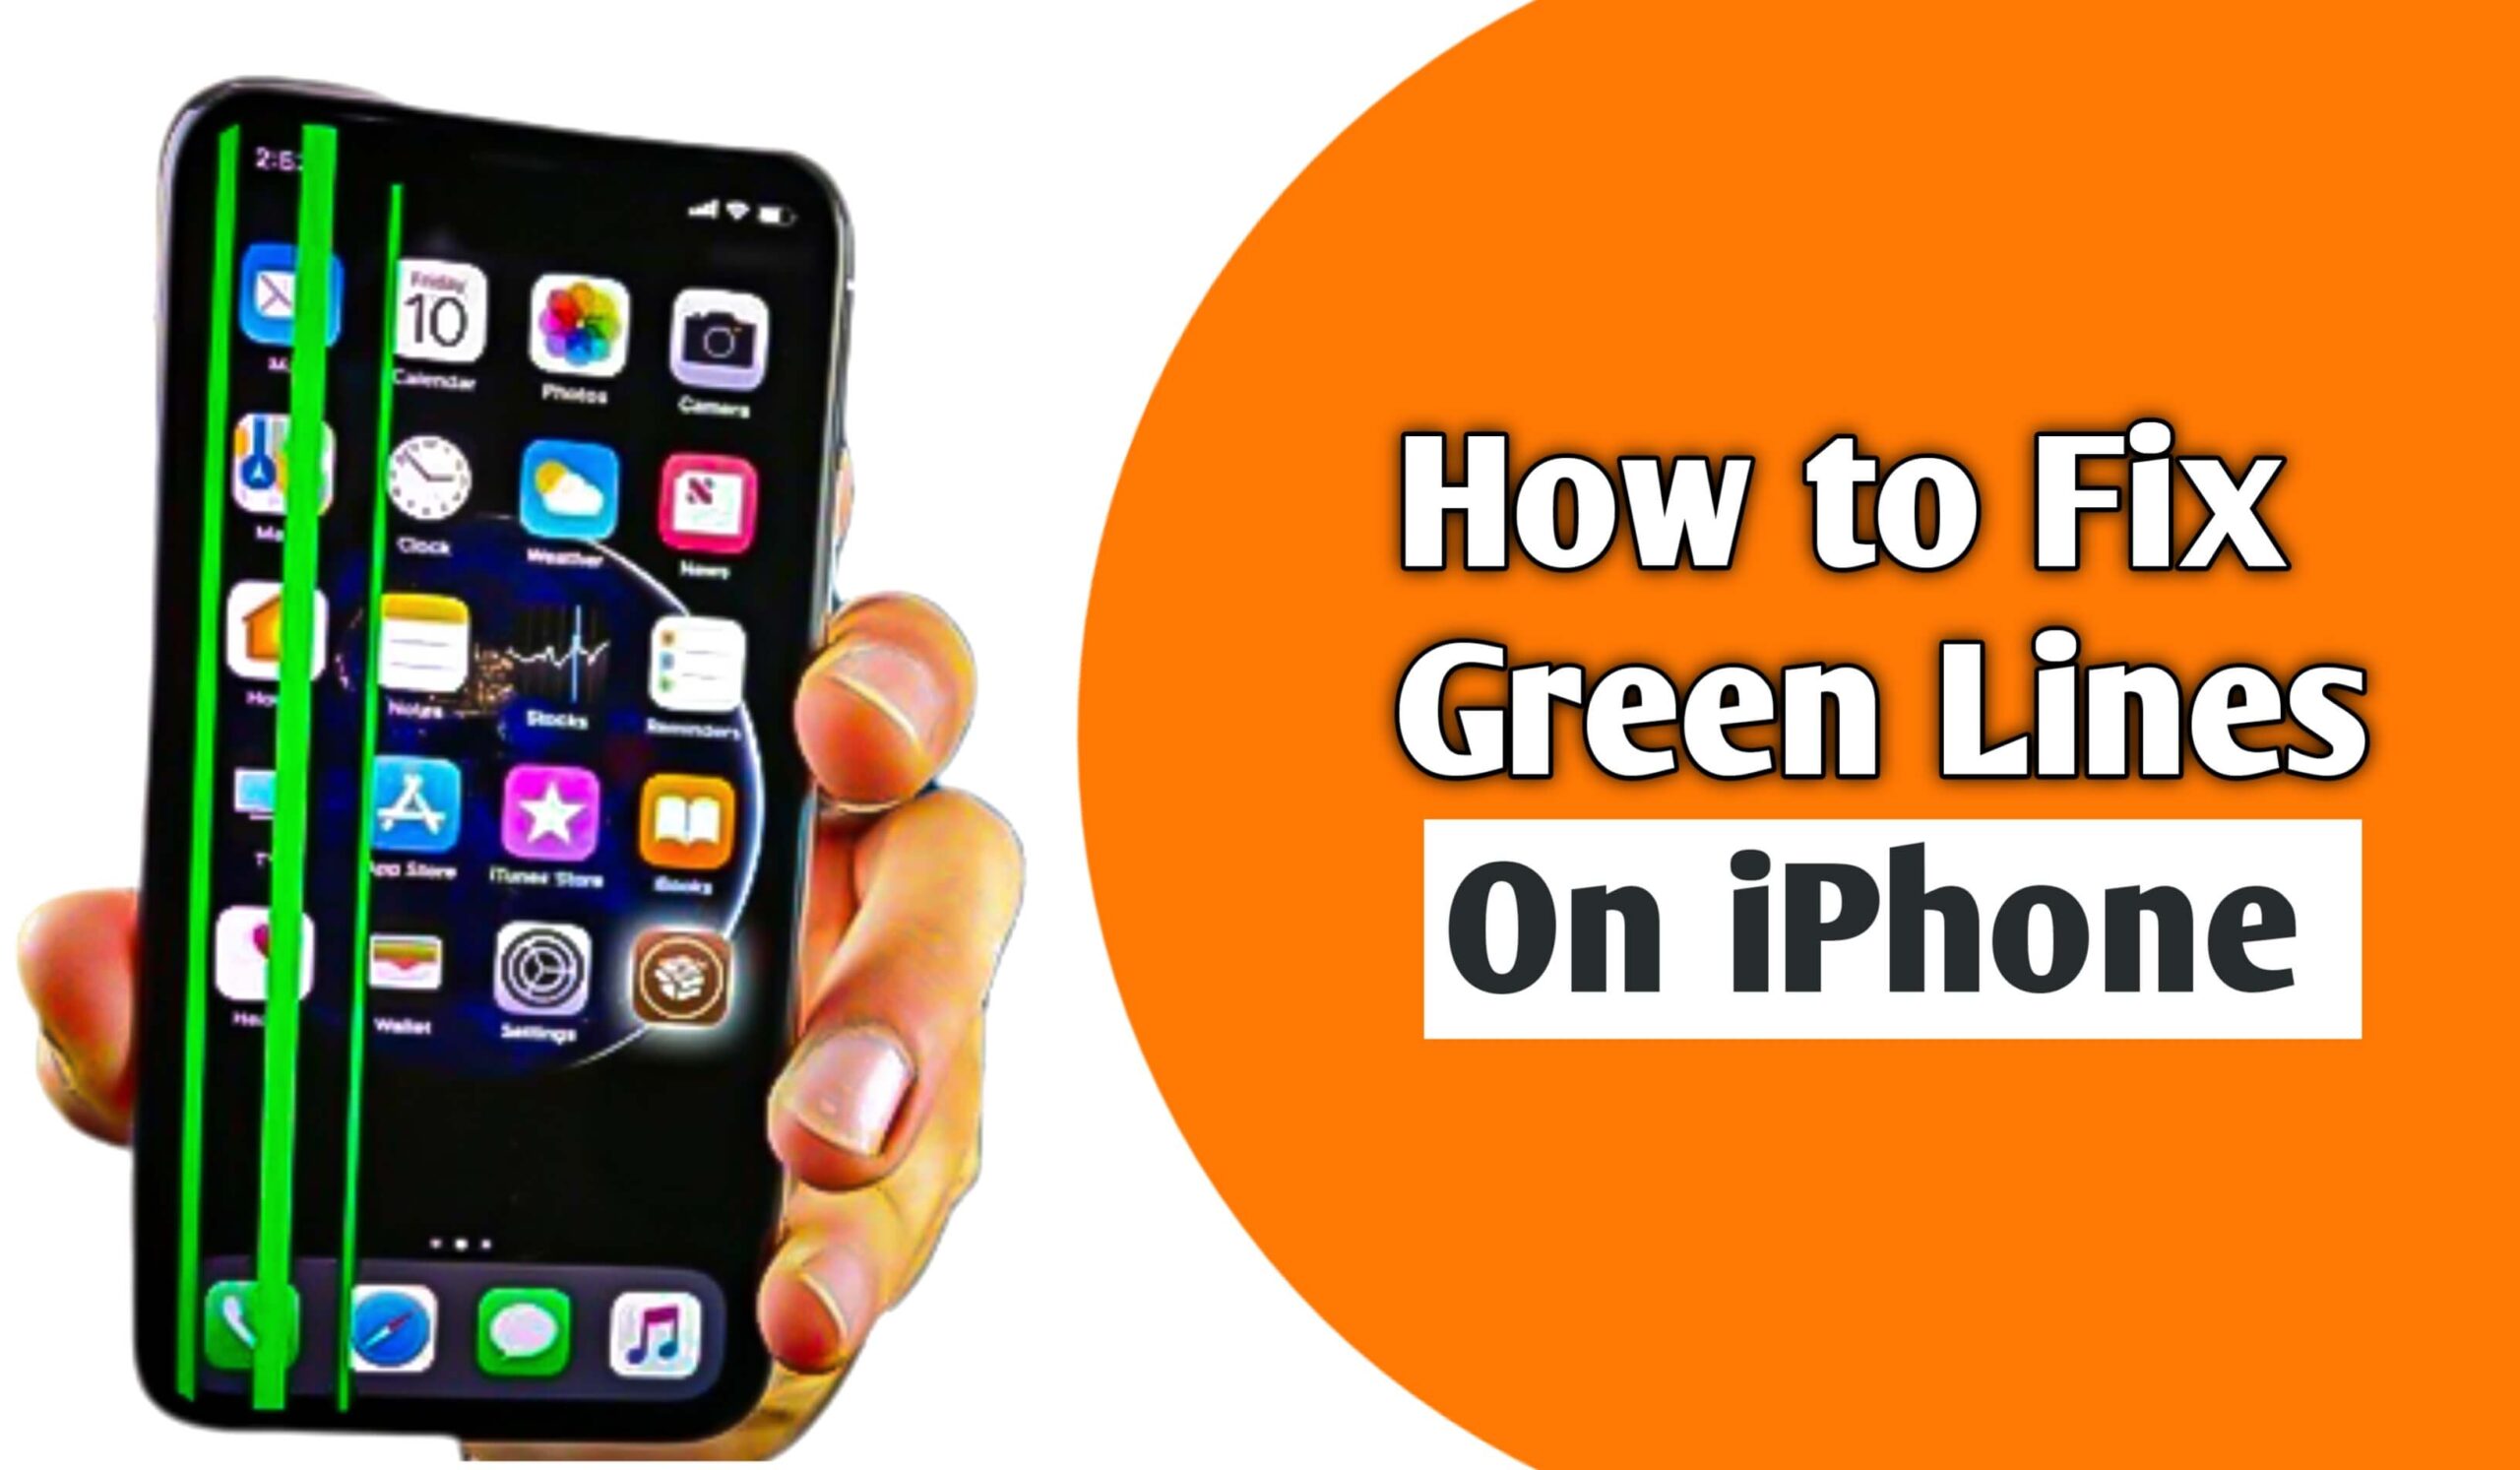
If you notice green lines appearing on your iPhone screen, it can be an alarming and frustrating issue. These lines can disrupt the display and affect the overall user experience. Fortunately, there are several troubleshooting steps you can take to address and fix the problem. In this article, we will guide you through the process of how to fix green lines on iPhone screen.
What Causes Horizontal or vertical Green Lines on an iPhone Screen?
If you are getting green lines on your iPhone, then the first thing you need to know is whether it is a software problem or a hardware problem. To know this, you have to make sure that your phone has not fallen somewhere. If your phone has fallen from you then the green line in your mobile can also be due to this reason, so it is very important to make sure that this software problem or hardware problem
Green lines on an iPhone screen can be caused by various factors, including hardware and software issues. Here are some of the most common reasons:
1. Physical Damage
If your iPhone has been dropped or subjected to impact, the internal components, particularly the display connectors or the display itself, may get damaged, leading to green lines or other display abnormalities.
Discovering mysterious green lines traversing your iPhone’s screen can be alarming and perplexing. Understanding the connection between physical harm and the appearance of horizontal or vertical green lines is crucial for iPhone users seeking effective solutions.
When accidents happen, such as inadvertent drops or impacts, the internal components of your iPhone can suffer unintended consequences. These incidents may lead to dislodged connections or damaged display modules, resulting in the emergence of those pesky green lines on the screen. Whether the lines stretch horizontally or vertically, they are indicative of an underlying problem that requires attention.
During the manufacturing process or due to wear and tear over time, the connections between the iPhone’s display and the internal components can become loose. This can result in green lines appearing on the screen.
If your phone is completely damaged then you will need to get it repaired by an apple technician
You Can Also Read this Post :- How to Block Snapchat on iPhone: A Comprehensive Guide
2. Water Damage
Exposure to water or other liquids can damage the display or internal circuitry of your iPhone, causing green lines and other screen issues.
To check for wetness on an iPhone screen, simply inspect the surface visually for any signs of moisture, water droplets, or condensation. Avoid using the device until it is completely dry to prevent potential damage.
If your iPhone accidentally falls into the water, you can save your phone from getting damaged with the help of some steps given below
- If you suspect that your iPhone might have come into contact with water or any other liquid, the first step is to power it off immediately. This helps prevent potential short circuits and further damage to the internal components.
- Take out your phone SIM tray with the help of SIM Ejector tool. Make sure that there should be no water drop or moisturizer in a SIM tray and check your sim. You can use cloth to clean water.
- Carefully examine the iPhone screen for any visible signs of wetness, water droplets, or condensation. Also, check the area around the charging port and other openings for any moisture.
- iPhones have Liquid Contact Indicators (LCIs) that change color when exposed to liquids. You can check the status of the LCIs by visiting Apple’s support page and following their guidelines for your specific iPhone model.
- Shine a bright light on the screen to look for any subtle moisture spots that might not be immediately apparent.
- If your iPhone shows signs of wetness, test the functionality of the screen, buttons, and other features. Unusual behavior or unresponsive areas on the screen could indicate water damage.
- If you suspect your iPhone is wet, avoid charging it until you are certain it’s dry. Connecting a wet iPhone to a power source can lead to further damage.
- To dry the iPhone, use a soft, absorbent cloth to gently pat and wipe off any visible moisture. You can also place the device in a bowl of uncooked rice or silica gel packets to help absorb the moisture. However, keep in mind that this method might not be as effective as using a professional drying agent.
- Give your iPhone ample time to dry completely before attempting to turn it on again. Depending on the extent of the moisture, this may take a few hours to a day.
Remember, water damage is not covered by the standard warranty, so it’s essential to take prompt action if you suspect your iPhone has been exposed to liquid. If the device does not function correctly after drying or shows persistent issues, it’s best to seek assistance from an authorized Apple service provider or contact Apple Support for further guidance.
How to Fix Green Lines on iPhone Screen
To fix the problem of green lines on the iPhone screen, forever some solution below may be helpful for you.
3. Software Glitches
Occasionally, software bugs or glitches can cause display anomalies, including green lines on the screen. This might happen after a software update or due to incompatible apps.
Sometimes, electromagnetic interference from other electronic devices or strong magnetic fields can disrupt the display, leading to green lines.
In some cases, a defective or low-quality display module can cause green lines or other display issues. The GPU is responsible for rendering images and graphics on your iPhone’s display. If it develops a fault or becomes damaged, it can cause green lines or other display problem
To troubleshoot and potentially resolve the issue, you can try the following steps
1. Restart Your iPhone
A simple restart can sometimes fix temporary software glitches. A effective solution for various display issues is to restart your iPhone. To restart your iPhone, follow these steps:
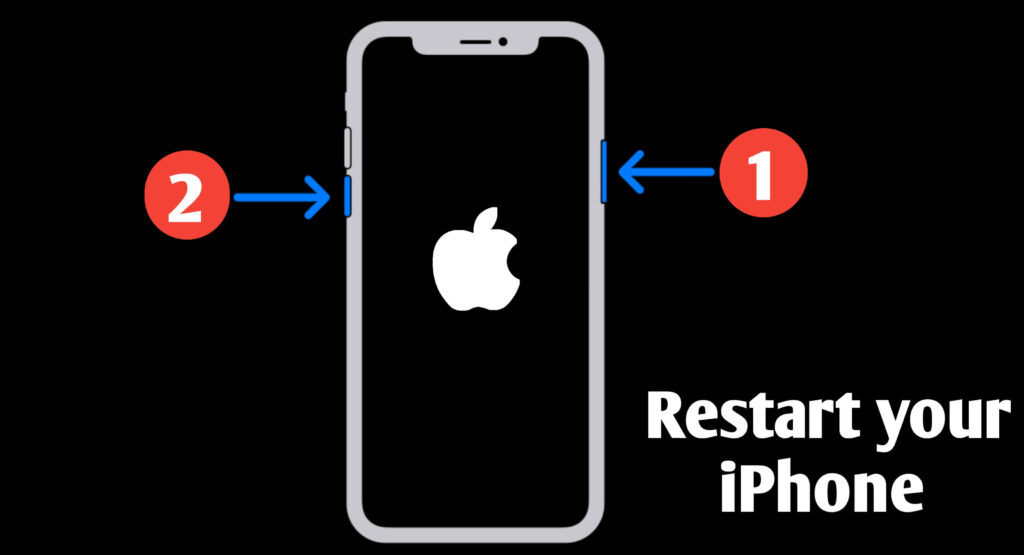
- Press and hold the power button (located on the side or top of your device) and either volume button simultaneously.
- Slide the “Power Off” slider when it appears on the screen.
- Wait for a few seconds, then press and hold the power button again until the Apple logo appears.
- Release the button, and your iPhone will restart.
Check if the green lines have disappeared after the restart.
2. Update iOS
Ensure your iPhone’s operating system is up-to-date, as newer software versions often include bug fixes. Outdated software can sometimes cause display problems. Updating your iPhone’s iOS can help resolve such issues. Here’s how to update iOS:
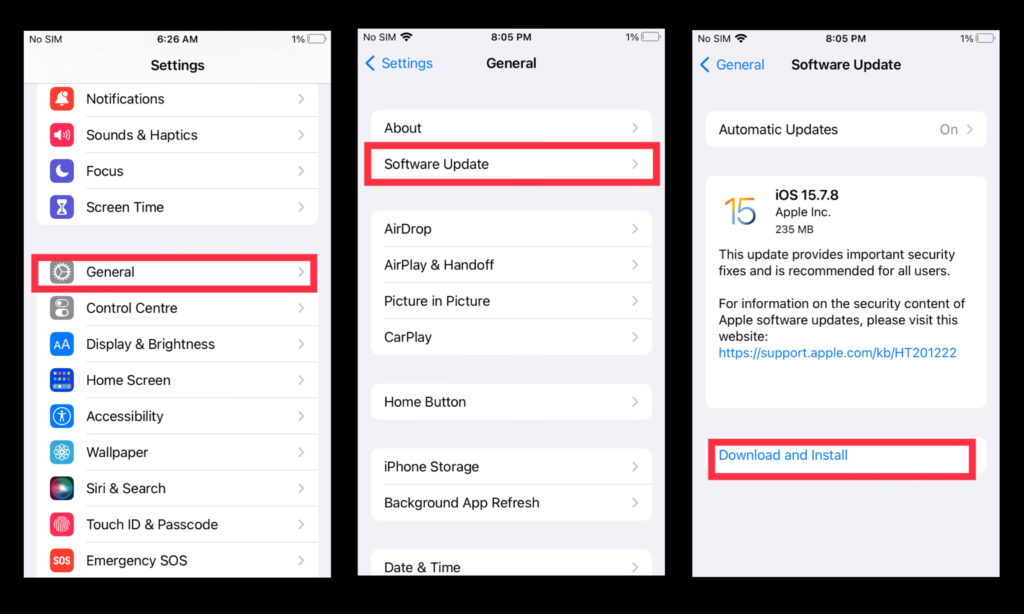
- Connect your iPhone to a Wi-Fi network.
- Go to “Settings” on your iPhone.
- Scroll down and tap on “General.”
- Select “Software Update.”
- If an update is available, tap on “Download and Install.“
- Follow the on-screen instructions to complete the update.
After the update is installed, check if the green lines have been resolved.
3. Check for App or Software Issues
If the problem occurs only in a specific app, try updating or reinstalling that app. Certain apps or software glitches can cause display abnormalities. To determine if a specific app is causing the green lines, follow these steps:
- Restart your iPhone and check if the lines are still present.
- If the lines disappear after the restart, open the apps you frequently use one by one to see if the lines reappear.
- If you notice the lines appearing only within a specific app, try updating or reinstalling that app from the App Store.
- If updating or reinstalling the app doesn’t resolve the issue, contact the app developer for further assistance.
4. Reset All Settings
Resetting all settings on your iPhone can help resolve any software-related issues that may be causing the green lines. Keep in mind that this process will erase your personalized settings, but your data and media will remain intact. To reset all settings:
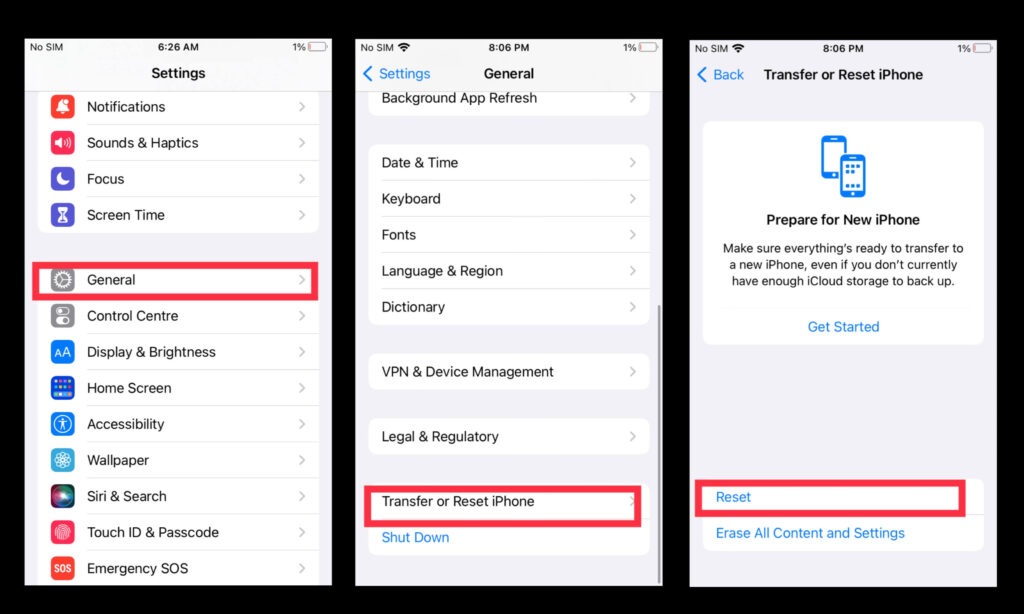
- Go to “Settings” on your iPhone.
- Scroll down and tap on “General.“
- Select ” Transfer or Reset iPhone.”
- Tap on “Reset.”
- Enter your passcode if prompted, and confirm the reset.
After the reset, check if the green lines have disappeared. If not, proceed to the next step.
5. Restore iPhone to Factory Settings
Restoring your iPhone to factory settings should be your last resort, as it erases all data and settings on your device. Before proceeding, make sure to back up your iPhone to preserve your data. To restore your iPhone to factory settings:
- Connect your iPhone to a computer and open iTunes (for macOS Mojave and earlier) or Finder (for macOS Catalina and later).
- Select your iPhone when it appears in iTunes or Finder.
- In the Summary tab, click on “Restore iPhone.”
- Follow the on-screen instructions to confirm the restore process.
- After the restore is complete, set up your iPhone as a new device or restore from a backup.
Check if the green lines have been resolved after the restore. If the issue persists, it may indicate a hardware problem, and you should contact Apple Support or visit an authorized service center.
6. Contact Apple Support
If none of the above steps resolve the issue, it’s recommended to contact Apple Support for further assistance. They can provide guidance tailored to your specific situation and determine if any hardware repairs or replacements are necessary.
How to Use the most Professional iOS System Recovery without Data Loss
Using a most professional iOS system recovery tool can help you fix various system-related issues on your iPhone without losing your data. One such tool is dr.fone – System Repair (iOS System Recovery), which is a reliable software that can repair iOS system problems effectively. Here’s how to use it:
Before you begin:
- Download and install the dr.fone – System Repair (iOS System Recovery) software on your computer. You can find this software on the official Wondershare website.
- Make sure you have a working USB cable to connect your iPhone to the computer.
Step-by-step guide:
- Launch the software: After installing dr.fone on your computer, open it. From the main screen, select “System Repair.“
2. Connect your iPhone: Use the USB cable to connect your iPhone to the computer. Once connected, dr.fone will detect your device automatically.
3. Select repair mode: In the next window, you’ll see two repair options: “Standard Mode” and “Advanced Mode.” The Standard Mode is the recommended option, as it fixes the iOS issues without data loss.
Advanced Mode should only be used if Standard Mode fails to resolve the problem but keep in mind that using Advanced Mode may erase your data.
4. Download firmware: Before starting the repair process, dr.fone will detect the iOS version suitable for your iPhone. Click “Download” to get the appropriate firmware package for your device.
5. Repair iOS system: Once the firmware is downloaded successfully, click on “Fix Now” to begin the repair process. The software will start repairing your iOS system automatically.
6. iOS’s system repair completed: After the repair process is finished, your iPhone will restart in normal mode. You should now be able to use your device without the previous system issues.
By using dr.fone – System Repair (iOS System Recovery) in Standard Mode, your data should remain intact. However, it’s always a good idea to back up your important data before attempting any system repair, just to be safe.
Please note that the software and its interfaces might be updated over time, so it’s recommended to refer to the official dr.fone documentation or support for the most up-to-date instructions.
Conclusion
Experiencing green lines on your iPhone screen can be concerning, but by following the troubleshooting steps outlined in this article, you can potentially resolve the issue. Start with simple solutions like restarting your iPhone and updating the iOS. If the problem persists, try resetting settings or restoring your iPhone to factory settings. Contact Apple Support if the issue continues to persist. Remember to back up your data before performing any restore or reset procedures.
